Porchside Gardening Has Moved
To continue reading new Porchside Gardening posts, visit: https://phipps.conservatory.org/blog
We will continue to publish information to help you in your home garden. You can also read a number of other blogs published by Phipps Conservatory and Botanical Gardens.
It’s Seed Starting Time!!!
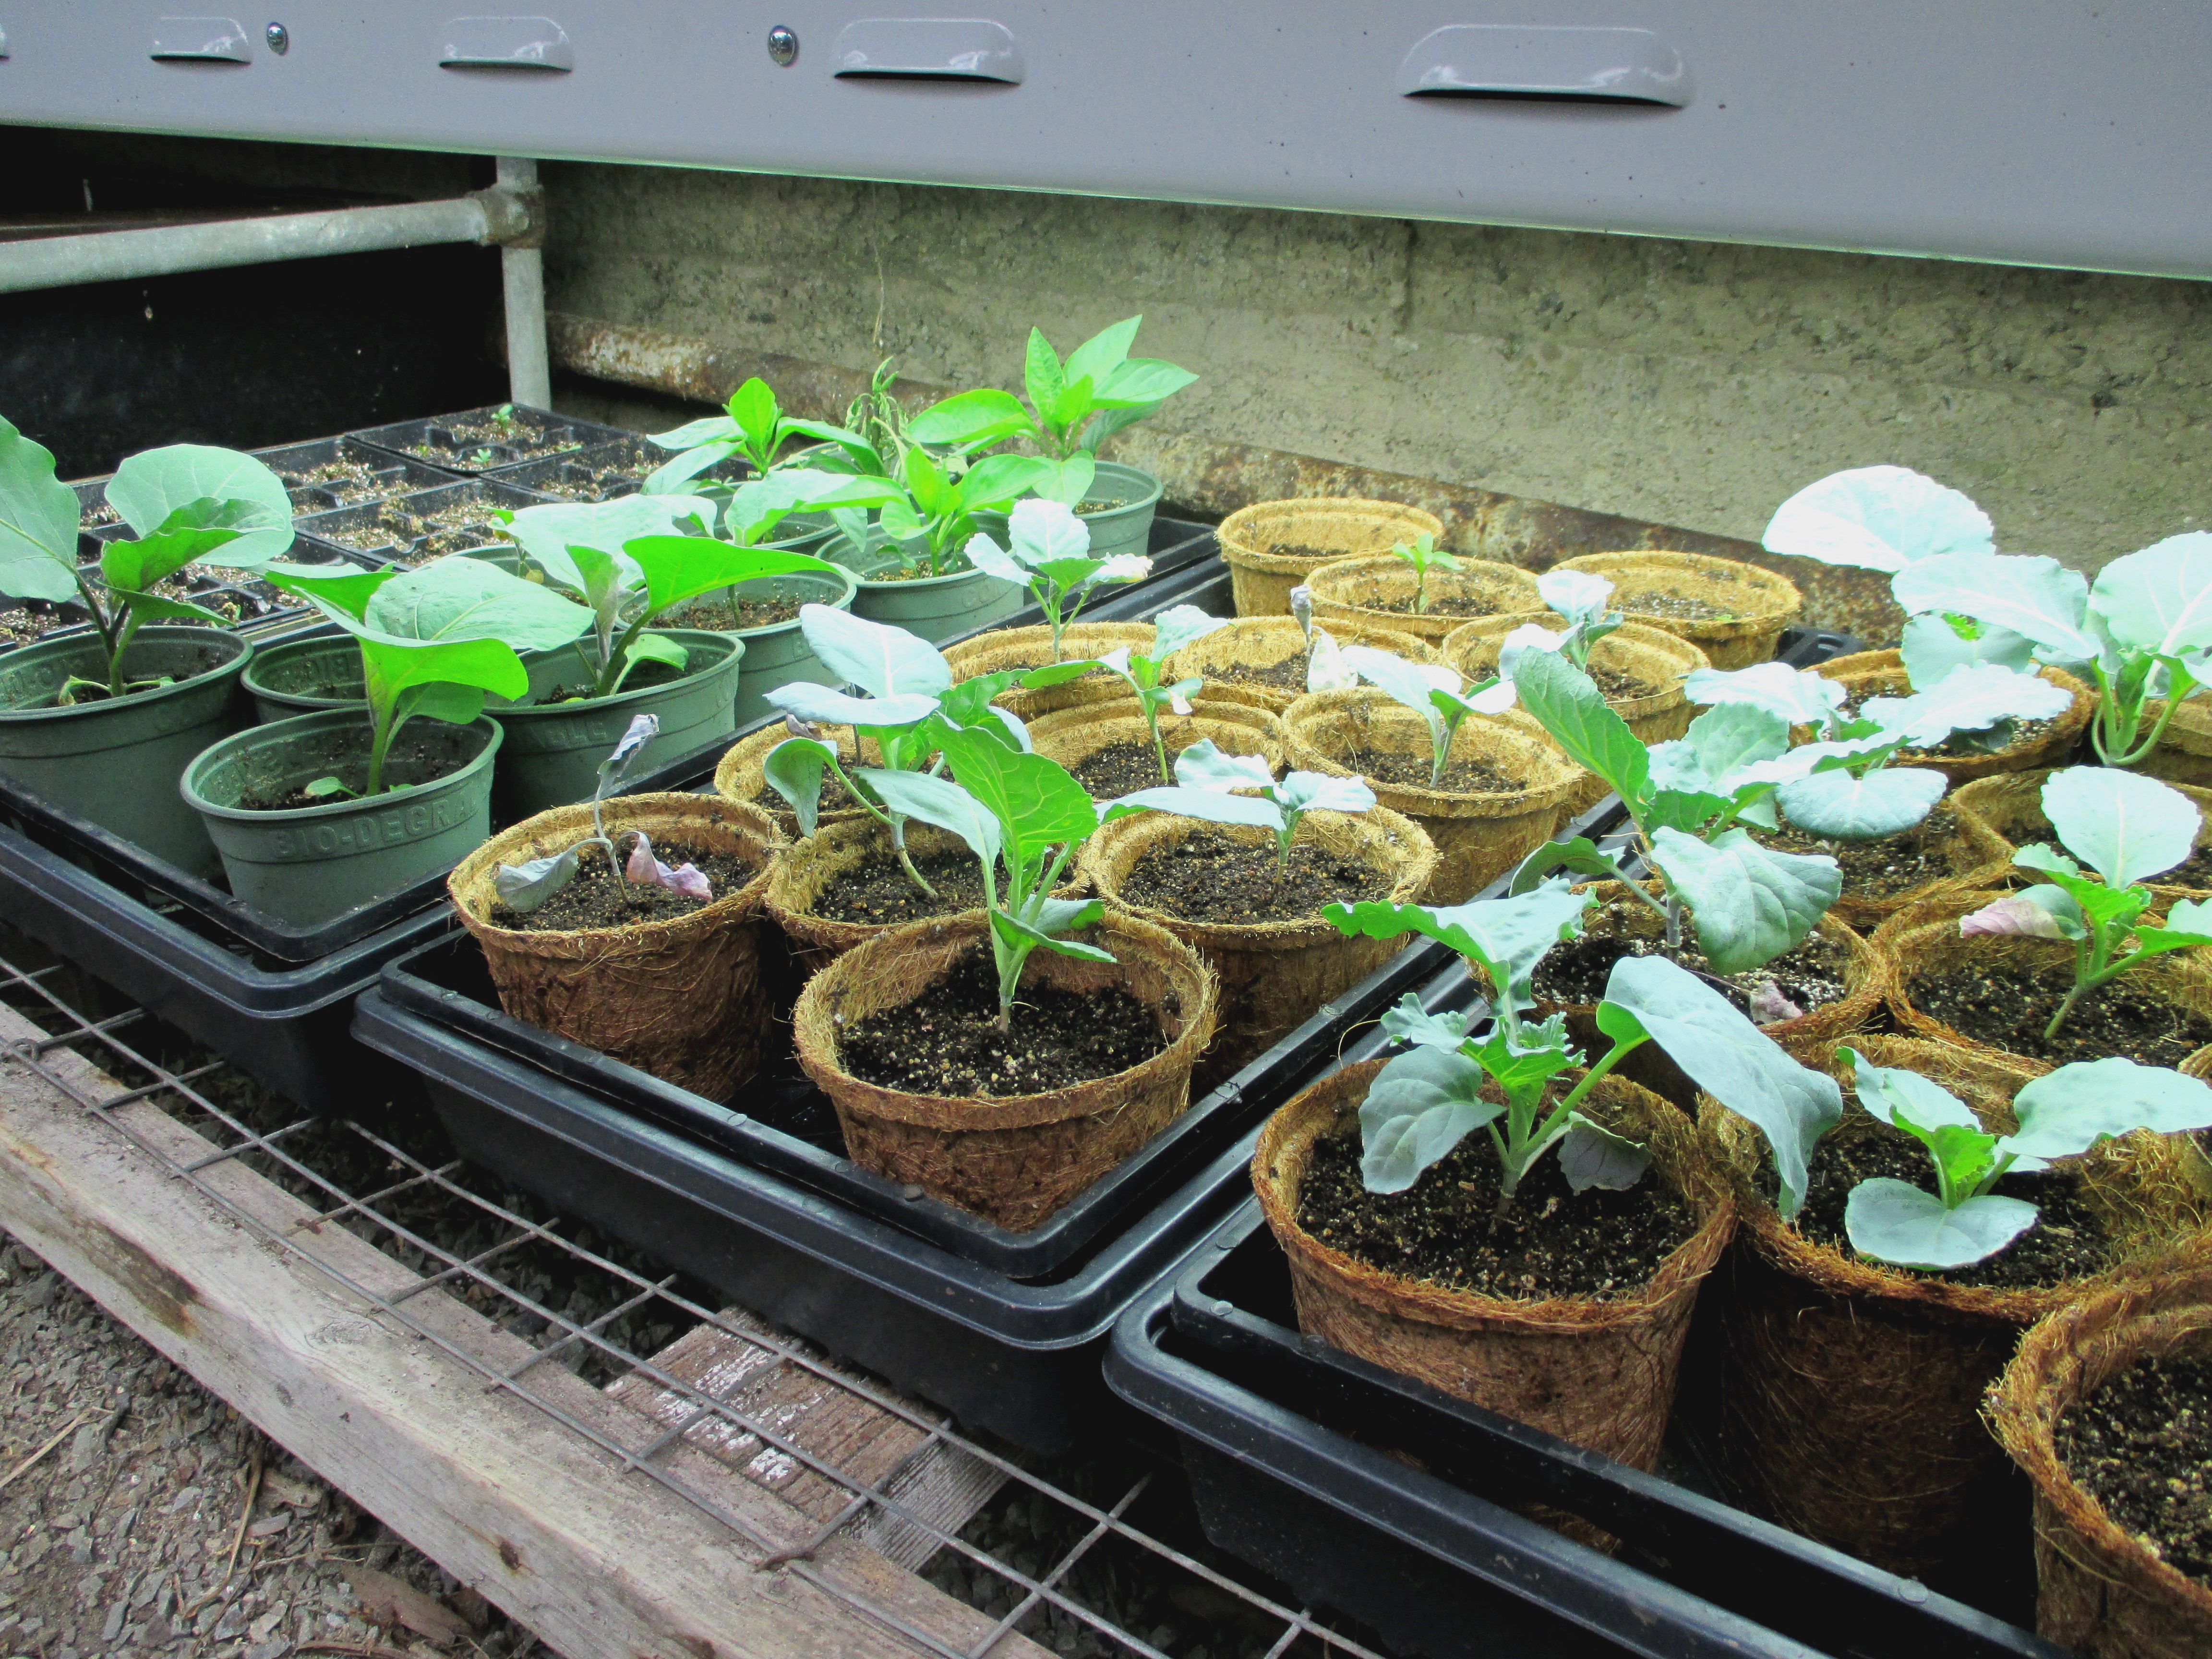
Photo Credit: Charity Grimes Bauman
Finally! It’s that time of year again – we can finally begin starting seeds indoors. It’s still winter outside, but the promise of spring is just weeks away. Indoor seed starting is the first chance of the year to start opening your vegetable seed packets, and get your hands dirty. You’ll also get a head start on your vegetable garden, have more choices of plant varieties, and save money.
This blog has covered many different aspects of seed starting over there years, so check out the links below for all the information you need to get started.
Indoor Vegetable Seed Starting– Details on the supplies you need to get started, and step-by-step directions for starting seeds.
Indoor Seed Starting Calendar– Dates for when to start different types of vegetable seeds for earliest harvests.
Choosing and starting seeds can also be a fun activity for kids. For tips on involving the whole family with starting seeds, explore these posts:
Starting Seeds– Tips for having young helpers start seeds, and ideas for creative recycled pots.
Seed Starting for the Junior Scientist – How to start seeds in a Root View, a fun and educational project.
The Common Language
Food sustains life, can keep us healthy and is often at the center of celebrations and holidays. Traditions and recipes vary from place to place and from family to family but food is a common language, breaking down barriers, encouraging people to gather and enjoy time spent around the dinner table.
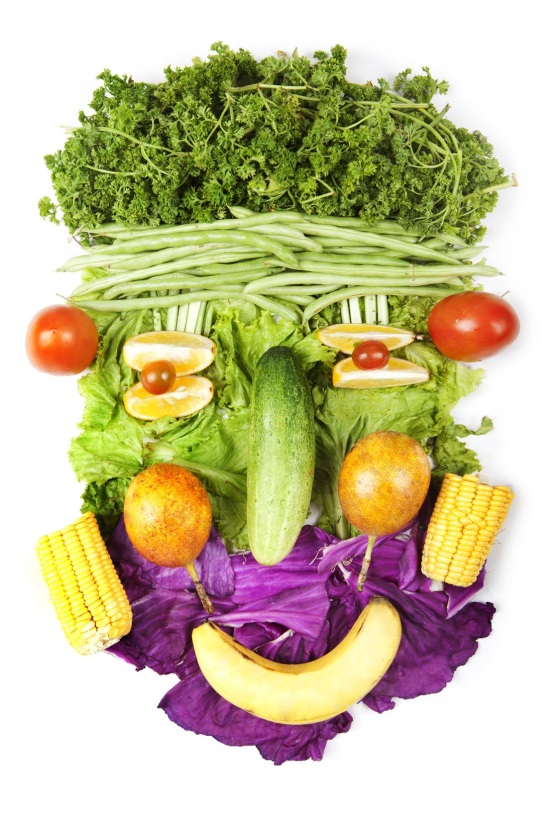 Do you have a favorite food you like to eat in the spring? With winter dragging on, keep alert! Certain foods can signify the changing of the seasons! Once you pass the fresh peas around your table you can bet that spring is coming. Common spring produce includes asparagus, broccoli, collards and peas. They can be included in soup if there is still a chill in the air or added in a crisp salad as the warmer weather shines in. Pasta salad is also a great way to incorporate fresh veggies into an easy meal.
Often, you will see similar produce used in recipes all over the world, like collard greens. An African recipe, common in the western coastal areas, uses collard greens in a traditional soup. This soup is called N’Dole. For more information about cultural recipes check out the following site: http://www.africaguide.com/culture/recipes/westafricanrecipes.htm
These early spring vegetables will add some color to your meal and are full of vitamins and antioxidants. For the picky eaters in your family, smoothies can be a great way to get those nutritious vegetables in to their diet. Below is an example of a smoothie that masks the more bitter taste of collards with the sweetness of fruit.
Collard Green Smoothie
1 large ripe banana
2 cups fresh collard greens
1 cup blueberries, frozen
¼ cup strawberries, frozen
1 cup pure water
Pour water into a blender. Add the banana by placing it close to the blade. Add the remaining ingredients on top, and blend the contents until smooth. Enjoy!
Nutrition Facts
Who would have thought that including vegetables in a smoothie could taste so good?! And the great thing about this cool treat is that it is packed with vitamins and minerals! Take a look at what all is inside:
BANANA-This fruit is full of potassium, fiber, vitamin C, and vitamin B6.
BLUEBERRIES– Blueberries are a wonderful source of antioxidants, which help protect your body from disease.
STRAWBERRIES– Strawberries are a great source of vitamin C, fiber, and antioxidants. One serving of strawberries actually has more vitamin C than an orange!
COLLARD GREENS– Collard greens are full of vitamins A, C, and K, and they are great sources of fiber in the diet. Collard greens are low in calories and help lower cholesterol levels.
Building a Compost Bin Out of Pallets
It may be too cold outside to plant, but it is the perfect time to plan for the hardscape structures you may want in your garden this spring. Winter projects bring warm thoughts of spring, which is exactly what a gardener needs this time of year. Adding a compost bin can make your gardening chores easier, and can recycle your leaves, clippings, and food scraps into garden fertility.
You don’t need anything more than recycled pallets and some basic hardware to get started. if you have the space we recommend a compost bin that has three separate holding stations, with each station holding compost in various stages of decomposition. A basic, single bay system can also be very effective. For an easy overview of building a single bay compost bin, watch the video below.
In the video, they show a hinged gate on the front of the compost bin. This is not necessary, but can help keep the pile tidy. You could also use chicken wire to create a front door which will also help keep critters out. Compost bins can be as simple or elaborate as you want. Spend a little bit of time dreaming this winter about what your compost bin will look like.
Growing Vegetable Soup
With video games, movies and endless options for online entertainment, more and more children are becoming disconnected from nature. This is especially true in urban settings. Yet, many proactive approaches are being taken that allow children to explore plants through food. Food and gardening is often the most relatable approach one can take to help today’s youth see the value of plants and what can be found in our natural world.
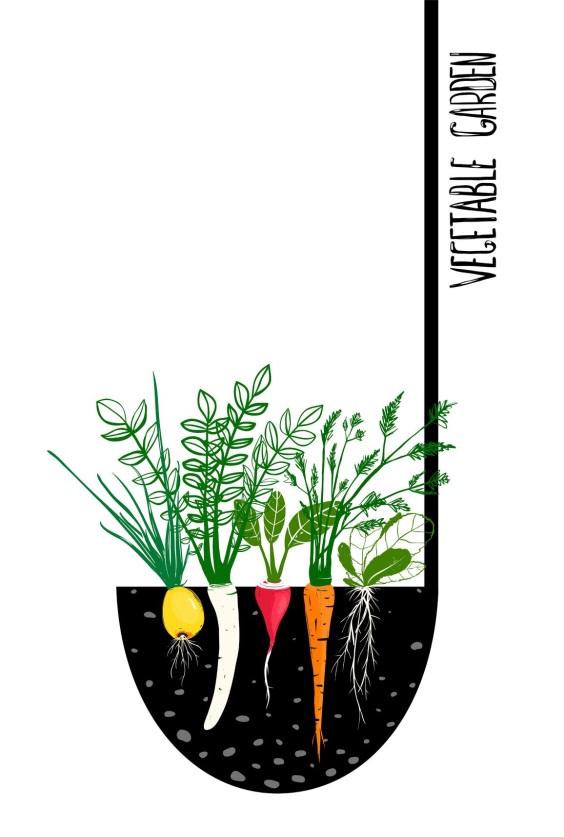 Food topics can be explored with hands-on activities that include gardening basics, cooking and snack making. Other approaches could include exploring produce for shapes and seeds, asking children what the differences are between fruits and vegetables, or asking children to explain the difference in taste when a vegetable is fresh versus when it is cooked. Hands-on engagement is the key when exploring a topic with children. But in the dregs of winter when the ground is frozen, storytelling and books are a great alternative to outdoor activities. Books can be a fantastic way to explore gardening inside, letting your imagination wonder. One such book that explores garden fun is Growing Vegetable Soup.
Open up the cover of Growing Vegetable Soup and begin a journey into a world that explores plant to plate garden tales in a fun and colorful way. Author, Lois Ehlert, a nationally recognized children’s book author and illustrator is the recipient of many literary awards including the Parents’ Choice Award. Ehlert is noted for her stylized and simple books that have shared the wonders of nature for decades, these include: Planting a Rainbow; Red Leaf, Yellow Leaf; Eating the Alphabet and In My World, just to name a few.
In Growing Vegetable Soup, Ehlert sets up a simple, step by step approach to the stages of gardening. The story gives a child’s eye view to growing vegetables and shows the differences in seeds, leaves and whether you pick or dig up your produce; there are even weeds in their garden! Collage-like pictures, bold colors and the simple but direct text is eye catching. The use of image labeling is fun and informative, and allows for picture and word association for little ones learning to read.
The cycles of planting, watering, growing and harvesting are illustrated in a visual account that brings to life this child’s excitement and curiosity about nature. The book culminates with the harvest and preparation of vegetable soup. They wash, chop and put the veggies into a soup pot! “It was the best soup ever…and we can grow it again next year.”
These types of positive messages reinforce the idea that growing food is not only achievable but can be fun and delicious! Lois Ehlert’s books have been used for story times and environmental education alike. The author’s works can be found online at the Amazon, Barnes and Noble and Scholastic websites.
Scouting and Managing Pests on your Indoor Herbs
Winter approaches, plants get moved indoors, and suddenly you find yourself engulfed in plants of all shapes and sizes. Aside from space, keeping plants indoors isn’t difficult. Plant growth will slow from reduced light and lower temperatures, but an issue often overlooked when bringing in plants resides in insects. Knowing and recognizing potential insect pests will help in the long run and prevent plant health from going downhill before spring arrives.
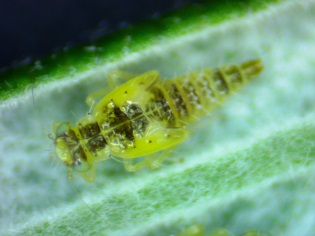
Sage Leafhopper (photo credit: Matt Quenaudon)
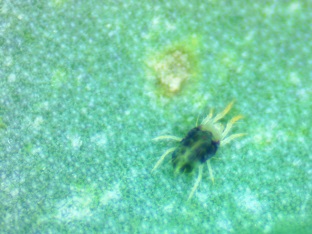
Two Spotted Spider Mite (Photo Credit: Matt Quenaudon)
Herbs such as rosemary, sage, thyme, and spearmint are food to a few different insects. The insects most likely to be encountered on these plants include two spotted spider mite (Tetranychus urticae), sage leafhopper (Eupteryx melissae), and spittlebugs (Cercopidae). Although common, these insects often go unnoticed due to their small size and where they reside on the plant (underneath the leaves). Plants should be inspected upon entry so that a large population won’t thrive undetected and affect ornamental plant health. Each one of the insects listed can be treated with horticulture oil, or a homemade 2% solution of oil with warm soapy water. It is advised to test your solution on part of the plant to prevent any phytotoxicity before application is made to the entire plant. The spray should cause the foliage to be wet, but not have runoff.
Citrus plants will involve mostly sap sucking insects such as brown citrus aphids (Toxoptera citricida), hemispherical scale (Saisettia coffae), black scale (saissetia oleae), and citrus mealybug (Planoccoccus citri). These insects latch onto the plant and feed by inserting their mouth parts into the plant cells, leading to lack of vigor, leaf curl, and stunting. A byproduct of these insects feeding, called honeydew, can lead to black sooty mold forming. Beneficial insects such as ladybeetle larvae can serve as a biological control in addition to Cryptolaemus larvae. Beneficial use is more difficult during winter months for various reasons, so manually removing pests in addition to applying any oils previously mentioned above are a good plan of attack. Stay vigilant and look for these insects shown below.
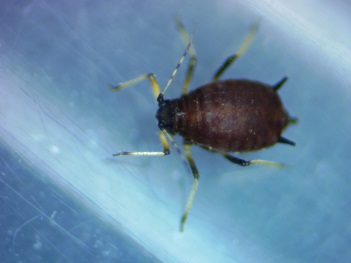
Brown Citrus Aphid (Photo Credit: Matt Quenaudon)
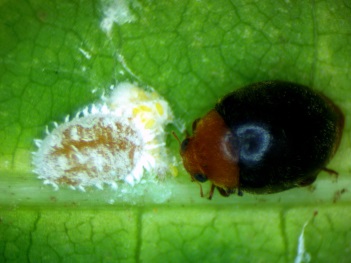
Citrus Mealybug (Photo Credit: Matt Quenaudon)
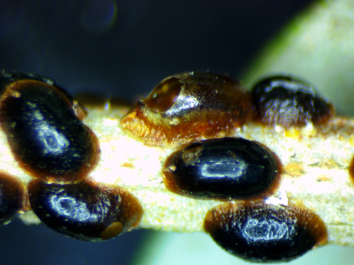
Black Scale (Photo Credit: Matt Quenaudon)
Winter Bird Feeders
Bird watching is a favorite winter pastime. Many birds, like cardinals and blue jays, add a splash of color to an often snow-blanketed landscape. Catching a glimpse of these winged, backyard friends is a treat! Watching for different kinds of birds, seeing different habits, and wondering how far birds fly often leaves children amazed.
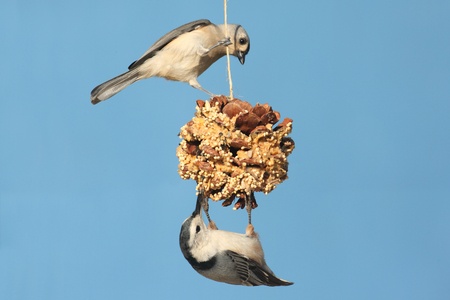 Attracting birds to your backyard can be accomplished by providing shelter and food; a bird feeder is a great way to attract feathered friends. Better yet, a biodegradable feeder leaves no mess for you to clean up and they are eco-friendly. With this in mind, pinecones are the perfect base for a bird feeder. Conifers, like pine trees, provide birds with protection from predators so birds often nest in these types of trees.
Birds also enjoy eating the seeds that can be found inside of the pinecones. But as the cold weather comes and food sources are scarce, you can help birds by making a suet feeder, which gives birds the extra fat and protein they need to survive the winter. It will serve the birds that are over wintering in Pennsylvania and allow the budding nature observer to watch these critters in action all winter long!
To make a bird feeder you will need a medium-sized pinecone, shortening, bird seed, a paintbrush and string.
Instructions:
- First, cut a 12″ length piece of string and tie it to the pinecone, then pour out the bird seed into a bin.
- Next, spread the shortening on the pinecone- using a paint brush gives an even coating.
- The final step is rolling your coated pinecone in bird seed.Tip: Placing the feeder in a quiet area of your yard or at the edge of a tree line is recommended. Make a pinecone bird feeder at Phipps; click here to find out more about our Family Fun Days activities!
To learn more about drying gourds and using them as a bird house, check out this post!
Cooking with Winter Squash
The garden may be mostly asleep now for the winter, but there are still local vegetables to be had. Winter squashes are harvested in the summer but store well into the fall and winter, so whether you grew some yourself or find them at the store they are a healthy, delicious winter vegetable.
 There are many kinds of winter squashes: acorn, butternut, delicata, pumpkin, etc.- but all are packed full of nutrients and vitamins. Their orange colored flesh indicates their biggest perk- high levels of beta-carotene (which your body converts to vitamin A), shown to protect against heart disease and breast cancer, and is important for eye health. They are also high in vitamin C, low in fat, a good source of fiber, and have antioxidant and anti-inflammatory properties.
Butternut squash in particular has a sweet flavor, and can lend a creamy richness to many dishes. When the cold has us craving warm comfort foods, think squash for healthier dishes without sacrificing flavor. There are two squash recipes below to try, enjoy!
Squasharoni and Cheese (Butternut Squash Mac and Cheese)
- 1 1lb box rigatoni or elbow pasta
- 1 ½ lbs butternut squash, peeled, seeded and cut into chunks (about 3 ½ cups)
- 2 ¾ cups milk or water
- 8 ounces smoked cheddar cheese, shredded (2 cups)
- 2 small sweet onions, cut into chunks (optional)
- 3 ounces breadcrumbs
- 2 tablespoons butter, melted
- Preheat the oven to 425°. Lightly butter a baking dish; set aside. Cook pasta according to package directions. Drain; transfer to a large bowl.
- Meanwhile, in a large saucepan combine the squash and 2 ½ cups of the milk/water over medium-high heat. Bring to boiling; reduce heat to medium, and simmer until the squash is tender when pierced with a fork, 18 to 20 minutes.
- Stir together the remaining ¼ cup milk/water and flour; stir into squash mixture. Bring to boiling; cook until thickened, 2 to 3 minutes. Stir in 1 ½ cups of the cheddar until melted; keep warm.
- Add onions to a skillet (if used); cover and cook over low heat 10 minutes, stirring occasionally. Uncover and increase heat to high. Cook 4 to 6 minutes more, stirring, until onions are golden.
- Add squash-cheese mixture and onions (if used) to the bowl with the pasta. Toss well to combine, then transfer to prepared baking dish.
- Add breadcrumbs to a small bowl; mix with melted butter. Sprinkle remaining cheddar and the bread crumbs over pasta mixture. Bake until top is browned, about 14 to 15 minutes. Cool 5 minutes. Sprinkle with parsley. Makes 6 to 8 servings.
Gourds
They can be colorful, big, small, warty or smooth. They are the sign that fall has arrived; they are gourds! Gourds are related to melons, squash, pumpkins, and cucumbers, which are all members of the Cucumber family.
 Gourds have been grown for thousands of years. They have been used as utensils, for storage, as instruments and as ornaments. Native Americans used gourds for food, as canteens and for ceremonial rattles, once dried. They even used the seeds for medicinal purposes.
There are many types of gourds but the three most common gourds are the cucurbita, or ornamental gourds; the lagenaria or hard shelled gourds and the luffa, or vegetable sponge gourd.
The cucurbita include the colorful, ornamental gourds that are different shapes and textures and often used in fall arrangements. The lagenaria group includes birdhouse and bottle gourds. Lagenaria gourds are green on the vine and turn a dark tan as they dry. Luffas have an outer shell that can be removed to expose a fibrous interior. This hardened sponge -like material is often used for bathing.
Gourds are a warm-season crop taking from 100 to 180 days to mature. Planting should occur when the danger of frost has passed. Harvesting can take place after the vines have turned brown. Be sure to leave a bit of the stem attached to the gourd.
To cure gourds you will need a dark, dry place that has good air circulation. Drying gourds is similar to drying herbs. The gourds can be laid out in a dry, ventilated area and should be check to make sure that mold doesn’t form. The exterior drying can take up to one week; to fully cure a gourd it can take upwards of four weeks or more.
So considering what type of gourd you want and what you will be using it for should be part of your initial selection. The ornamental gourds are beautiful as is and can be incorporated into fall craft projects or arrangements. Another popular use for gourds is for birdhouses. Building and decorating a gourd birdhouse can be a fun, family project. It can take on endless creative directions and can be as simple or intricate as you like. It will serve the birds that are over wintering in Pennsylvania and allow the budding nature observer to watch these critters in action all winter long. Click here for step by step instructions on making a gourd birdhouse. Consider holiday painting themes like pilgrims or snowmen!

Homegrown Popcorn
 As outdoor activities decrease and we begin to retreat inside, what better way to celebrate the season (and watch a scary movie) then to curl up on the couch with a big bowl of homegrown popcorn. Varieties of popcorn have been grown for years in the US. Commercially most of the production is in the Midwest, in states such as Nebraska and Indiana. However, many of the seed companies that you would buy your typical vegetable seeds from also offer popcorn seed.
Popcorn takes the same cultural requirements that would go into growing sweet corn. The key to good popcorn though is to pick it when it is properly dried out. At the end of the growing season the kernels start to harden on the ears and the husks start to dry.
When you think the kernels are dry enough, you can test it by picking one ear, peeling the husk off back, and giving the ear a hard twist between your two hands. A few kernels should come off of the ear; these will be you test kernels.
If you are popping it on the stove top you will need a sauce pot with a lid. Put enough oil in the pot to cover the bottom and then turn it on medium heat. When the oil is hot, throw in a couple kernels and put the lid back on the pot. It will take a few seconds but the kernels will explode and transform into a small popped piece of corn. If the popcorn is to chewy it then needs more time to dry out, so leave the ears on the stalks a little longer and keep testing kernels until you have the popped kernels are light and crisp
Once you have all your ears harvested, they need to be stored in a cool dry place like a garage, but make sure they are protected from rodents. You can either shuck the ears as needed, or shuck them all at once. While it’s a larger endeavor to do it all at once, it pays off in the end when you can simply take scoops of kernels whenever you want to pop some popcorn.
Next year set aside some space in your garden and grow some popcorn. You will be rewarded in the fall when you are curled up on the couch watching you favorite scary movie with a big bowl of your homegrown popcorn.
